

Building a Real-Time Chat Application with WebSockets in JavaScript
Creating Instant Connections: Building a Real-Time Chat App with WebSockets in JavaScript
Real-time applications have become a crucial part of modern web development. Whether it’s a live scoreboard, a collaborative tool, or a chat application, users expect instantaneous updates without needing to refresh the page. One of the most effective ways to build such real-time functionality is by using WebSockets.
In this guide, we will walk through the process of building a real-time chat application with WebSockets in JavaScript, covering both the frontend and backend.
What is WebSocket?
WebSocket is a protocol that enables two-way communication between a client (typically a web browser) and a server over a single, long-lived connection. Unlike traditional HTTP requests (where the client sends a request and the server responds), WebSocket allows the client and server to send messages to each other at any time.
This makes WebSocket an ideal solution for real-time applications like chat apps, where messages need to be instantly sent and received.
Setting Up the Project
We'll be using Node.js for the backend and plain JavaScript for the frontend. For the WebSocket implementation, we'll use the ws library for Node.js.
Step 1: Install Node.js and Express
First, ensure that you have Node.js installed. Then, create a new project directory and initialize it:
mkdir websocket-chat-app
cd websocket-chat-app
npm init -y
Next, install Express and ws for WebSocket support:
npm install express ws
Step 2: Setting Up the Backend with WebSocket
We’ll start by creating a basic WebSocket server using Node.js and Express.
- Create a file called
server.js:
const express = require("express");
const http = require("http");
const WebSocket = require("ws");

// Create a new express app and HTTP server
const app = express();
const server = http.createServer(app);

// Create a WebSocket server
const wss = new WebSocket.Server({ server });

// Serve static files (frontend HTML, CSS, JS)
app.use(express.static("public"));

// Store connected clients
const clients = new Set();

// When a client connects
wss.on("connection", (ws) => {
  console.log("New client connected");
  clients.add(ws);

  // Listen for incoming messages
  ws.on("message", (message) => {
    console.log("Received:", message);

    // Broadcast the message to all connected clients
    clients.forEach((client) => {
      if (client !== ws && client.readyState === WebSocket.OPEN) {
        client.send(message);
      }
    });
  });

  // Remove client when it disconnects
  ws.on("close", () => {
    console.log("Client disconnected");
    clients.delete(ws);
  });
});

// Start the server on port 3000
server.listen(3000, () => {
  console.log("Server is listening on port 3000");
});
This code does the following:
Sets up an HTTP server using Express to serve static files (HTML, CSS, JS).
Creates a WebSocket server that listens for new connections.
Broadcasts messages received from one client to all other clients.
Step 3: Creating the Frontend
Now that we have the backend WebSocket server, let’s create a simple frontend that will allow users to send and receive messages in real time.
- Create a
publicdirectory with anindex.htmlfile:
<!DOCTYPE html>
<html lang="en">
<head>
  <meta charset="UTF-8">
  <meta name="viewport" content="width=device-width, initial-scale=1.0">
  <title>WebSocket Chat with File Upload</title>
  <style>
    /* Styling remains the same */
    body {
      font-family: Arial, sans-serif;
    }
    #chat {
      max-width: 600px;
      margin: 0 auto;
      padding: 20px;
      border: 1px solid #ccc;
      background: #f9f9f9;
    }
    #messages {
      height: 300px;
      overflow-y: scroll;
      border: 1px solid #ddd;
      padding: 10px;
    }
    .message {
      margin: 5px 0;
    }
    #input-form {
      display: flex;
      margin-top: 10px;
    }
    #message-input {
      flex-grow: 1;
      padding: 10px;
      border: 1px solid #ddd;
    }
    #send-button {
      padding: 10px;
      background: #28a745;
      color: white;
      border: none;
      cursor: pointer;
    }
  </style>
</head>
<body>
  <div id="chat">
    <h1>WebSocket Chat</h1>
    <div id="messages"></div>

    <form id="input-form">
      <input type="text" id="message-input" placeholder="Enter your message" autocomplete="off" />
      <button id="send-button">Send</button>
    </form>
  </div>

  <script>
    const messagesDiv = document.getElementById('messages');
    const messageInput = document.getElementById('message-input');
    const form = document.getElementById('input-form');

    // Connect to WebSocket server
    const ws = new WebSocket('ws://localhost:3000');
    ws.onmessage = (event) => {
  // Check if the message is a Blob (binary data)
  if (event.data instanceof Blob) {
    // If it's a Blob, convert it to text
    const reader = new FileReader();
    reader.onload = function() {
      // Once the file is read, display the result (which will be text)
      const newMessage = document.createElement('div');
      newMessage.classList.add('message');
      newMessage.textContent = reader.result; // This will contain the actual text
      messagesDiv.appendChild(newMessage);
      messagesDiv.scrollTop = messagesDiv.scrollHeight;  // Scroll to the bottom
    };

    reader.readAsText(event.data);  // Read Blob as text
  } else {
    const newMessage = document.createElement('div');
    newMessage.classList.add('message');
    newMessage.textContent = event.data;  // This should display the text
    messagesDiv.appendChild(newMessage);
    messagesDiv.scrollTop = messagesDiv.scrollHeight;
  }
};
    // Handle form submission for text messages
    form.addEventListener('submit', (e) => {
      e.preventDefault();
      const message = messageInput.value;
      if (message) {
        ws.send(message);
        messageInput.value = '';
      }
    });

  </script>
</body>
</html>
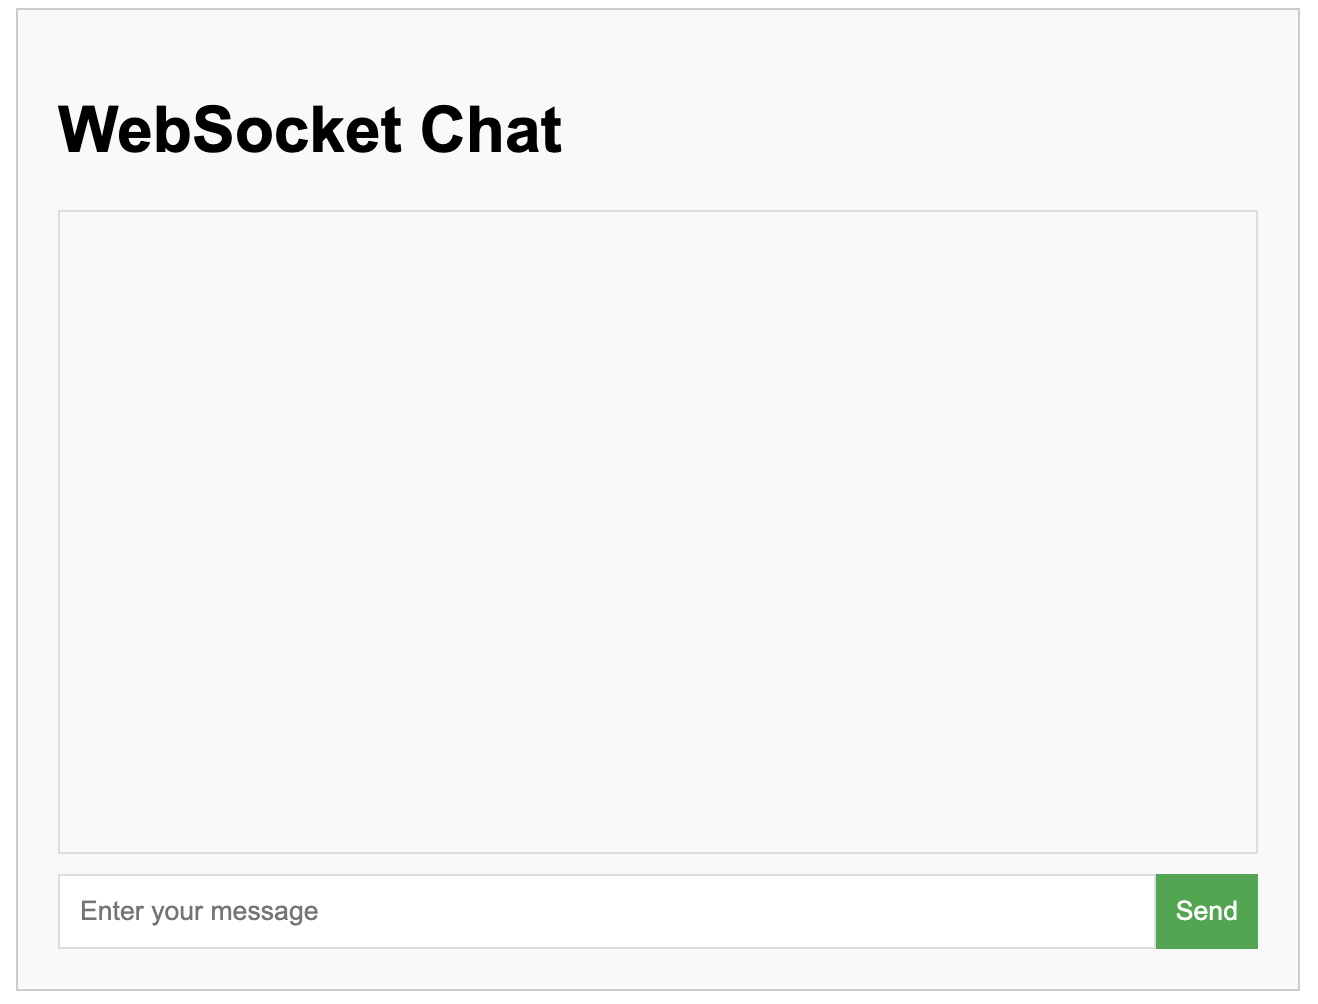
This frontend contains:
An input field for typing messages.
A "Send" button to submit the message.
A
divthat displays incoming messages.JavaScript to handle WebSocket connections and real-time message updates.
Running the Application
- Start the server:
node server.js
Open your browser and navigate to
http://localhost:3000. You should see the chat interface.Open multiple tabs or windows to simulate different users and start chatting!
Enhancing the Chat App
While this is a basic real-time chat app, there are plenty of ways you can enhance it:
1. Display Usernames
- You can prompt users to enter a username when they join the chat and display their name next to each message.
2. Add Message Timestamps
- Add timestamps to each message to indicate when it was sent.
3. Private Messaging
- Implement direct messaging between specific users instead of broadcasting to everyone.
4. Store Chat History
- Use a database (like MongoDB or MySQL) to store chat history and display past messages when a user connects.
5. Emojis and Rich Text
- Enhance the chat experience by allowing users to send emojis or format text (bold, italics, etc.).
Conclusion
With a basic understanding of how WebSockets operate, you can now explore and expand upon this foundation to build more feature-rich and scalable applications.
Happy coding! 🎉
About the author
Our company comprises seasoned professionals, each an expert in their field. Customer satisfaction is our top priority, exceeding clients' needs. We ensure competitive pricing and quality in web and mobile development without compromise.
Comments
Join the discussionNo comments yet. Be the first to comment.


